ICommand Interface In MVVM - WPF
Download Code: WPFICommandDemo-Code-21.zip
In this article, you will learn how to use ICommand in WPF. In WPF with MVVM architecture, we don't write events for control in code behind. We use command binding instead of that. Here, in this article, we will understand this with Button Control.
ICommand gives us the way to Bind the Command property of the Button control with the command which we define in ViewModel and that command is binding with the method.
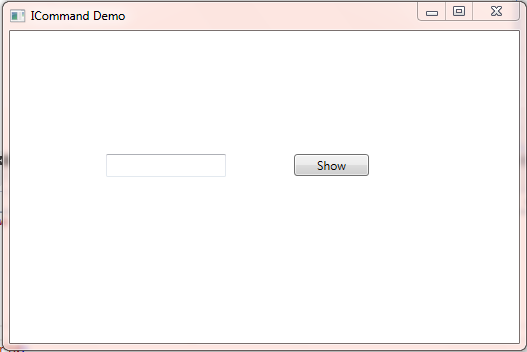
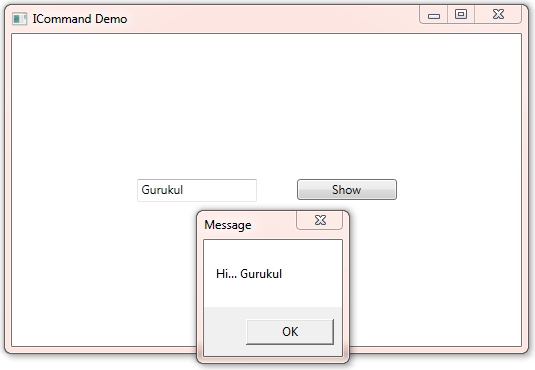
First, we learn about the ICommand interface and after that, we will take an example to understand the concept. Suppose we have a textbox and a button in the UI When the user writes some text and clicks the button. the message will be shown in the message box.
ICommand interface
this interface comes under the System.Windows.Input
this interface having two methods and one Event.
Method
a) CanExecute(Object) - Defines the method that determines whether the command can execute in its current state.
b) Execute(Object) - Defines the method to be called when the command is invoked.
Event
a) CanExecuteChanged - Occurs when changes occur that affect whether or not the command should execute.
Our UI will look like as below

Below is the XAML of the UI
XAML Code
<Window x:Class="WPFICommandDemo.CommandDemo "
        xmlns="http://schemas.microsoft.com/winfx/2006/xaml/presentation"
        xmlns:x="http://schemas.microsoft.com/winfx/2006/xaml"
        xmlns:d="http://schemas.microsoft.com/expression/blend/2008"
        xmlns:mc="http://schemas.openxmlformats.org/markup-compatibility/2006"
        xmlns:local="clr-namespace:WPFICommandDemo"
        mc:Ignorable="d"
        Title="ICommand Demo" Height="350" Width="525">
    <StackPanel Orientation="Horizontal" VerticalAlignment="Center" HorizontalAlignment="Center">
        <TextBox x:Name="txtMessage" HorizontalAlignment="Left" Height="23" Margin="20" TextWrapping="Wrap" VerticalAlignment="Top" Width="120"/>
        <Button x:Name="btnShow" Content="Show" HorizontalAlignment="Left" Margin="20" VerticalAlignment="Top" Width="100"/>
    </StackPanel>
</Window>
Now we will implement the ICommand interface, let's define a class RelayCommand (You can take any name, some user confuse and think RelayCommand is some WPF Class for command or standard way of implementation).
Below is the implementation of RelayCommand
RelayCommand Code
public class RelayCommand : ICommand
    {
        private Action<object> execute;
        private Func<object, bool> canExecute;

        public RelayCommand(Action<object> execute)
        {
            this.execute = execute;
            this.canExecute = null;
        }

        public RelayCommand(Action<object> execute, Func<object, bool> canExecute)
        {
            this.execute = execute;
            this.canExecute = canExecute;
        }

        public event EventHandler CanExecuteChanged
        {
            add { CommandManager.RequerySuggested += value; }
            remove { CommandManager.RequerySuggested -= value; }
        }

        public bool CanExecute(object parameter)
        {
            return this.canExecute == null || this.CanExecute(parameter);
        }

        public void Execute(object parameter)
        {
            this.execute(parameter);
        }
    }
We have created two constructors, one with Action and the second one with Action and Func delegate. In Action, you can pass method name what you want to Invoke when the button is clicked. Func is the boolean type and any method or expression which return bool you can pass there.
Now the implementation of RelayCommand can be used in ViewModel to Create Command for the button. following code shows how to create a command for a button.
        private ICommand showCommand;
        public ICommand ShowCommand
        {
            get
            {
                if (showCommand == null)
                    showCommand = new RelayCommand(p => OnShow());
                return showCommand;
            }
        }
ShowCommand will be bind with the Show button in XAML. and which is attached with a method. When the user clicks that button the Command will invoke and attached method will be called.
Below is the implementation of ViewModel with Command.
ViewModel with Command Implementation
public class CommandDemoViewModel : INotifyPropertyChanged
    {

        private ICommand showCommand;
        public ICommand ShowCommand
        {
            get
            {
                if (showCommand == null)
                    showCommand = new RelayCommand(p => OnShow());
                return showCommand;
            }
        }

        private void OnShow()
        {
            MessageBox.Show("Hi... " + MessageText, "Message", MessageBoxButton.OK);
        }

        private string messageText;
        public string MessageText
        {
            get
            {
                return messageText;
            }
            set
            {
                messageText = value;
                OnPropertyChanges("MessageText");
            }
        }
        public event PropertyChangedEventHandler PropertyChanged;

        public void OnPropertyChanges([CallerMemberName]string name = null)
        {
            PropertyChanged?.Invoke(this, new PropertyChangedEventArgs(name));
        }
    }
XAML Code with Command Binding
<Window x:Class="WPFICommandDemo.CommandDemo "
        xmlns="http://schemas.microsoft.com/winfx/2006/xaml/presentation"
        xmlns:x="http://schemas.microsoft.com/winfx/2006/xaml"
        xmlns:d="http://schemas.microsoft.com/expression/blend/2008"
        xmlns:mc="http://schemas.openxmlformats.org/markup-compatibility/2006"
        xmlns:local="clr-namespace:WPFICommandDemo"
        mc:Ignorable="d"
        Title="ICommand Demo" Height="350" Width="525">
    <StackPanel Orientation="Horizontal" VerticalAlignment="Center" HorizontalAlignment="Center">
        <TextBox x:Name="txtMessage" Text="{Binding MessageText}" HorizontalAlignment="Left" Height="23" Margin="20" TextWrapping="Wrap" VerticalAlignment="Top" Width="120"/>
        <Button x:Name="btnShow" Content="Show" Command="{Binding ShowCommand}" HorizontalAlignment="Left" Margin="20" VerticalAlignment="Top" Width="100"/>
    </StackPanel>
</Window>
Now Run the Code
Input some text in Textbox and click the button, this will display the message as below

